The Singer 221 "Featherweight" is easily the most popular vintage sewing machine, by far. It has numerous fan clubs, collector websites and dealers of reproduction parts made just for it. Of course with this popularity comes a higher value. Because of this, I have not had the chance to own one...until now. I also found all the adoration a bit annoying. Hey, there are lots of old machines needing love out there. Why not just use one of those? It is for sure an amazing gift and so now begins the exploration of this sewing machine. What is the fuss about anyway? Huge fuss. Fanatical fans.
There is no denying the most obvious thing about this machine: it is small. It is like a toy, but for real. Teeny yet just big enough to get the job done. It is light, I could carry it in one hand. The total weight is around 11 pounds and with a case is just under 20. My other machines vary in weight but most are around 40 pounds plus case.
That brings me to the other thing about this machine: the case. It is a very practical and clever design. This is one sewing machine and case truly made to be portable. It fits perfectly with room for foot control, accessories with space for things like scissors, thread and so forth. There is even a place for an oil can. This photo shows the machine with the top open revealing the gears inside. It pivots back into place.
How does it sew? I am pretty impressed with this as well. It is very small and so I expected it to be less than powerful. It is less than the "heavyweights" such as Singer 201 or 15-91 of the same era yet does quite well. It performed well on various types of fabrics as well as long as the right needle and thread combination are used. It had trouble with denim but got through the job with some help of turning the hand wheel. The only drawback is that it is small and so fitting big items inside the harp area of the machine was tricky. I guess that is why the Singer 222 free arm model was made.
The 221 takes low shank attachments and so wow, lots to play with in this area. A hundred years of attachments go with it from the modern clear plastic 1/4" foot to the 1889 ruffler work on it. Entire websites cater to the topic of Featherweight accessories. Zigzaggers, sock darners, penguin walking feet, even fabric covers made just for them. Fun fun fun.
This little machine is so easy to take on the road, I have done it already. I hear many people got this model just to take to classes and I see why. This photo was taken inside a theater. To get to this dressing room it is through a parking lot, up stairs, through a maze of set obstacles and though two sets of heavy doors. With "Tiny" it was no problem. Saved me tons of time by fixing any alterations right then and there. Just when I thought this 221 was to be a special toy, it turned out to be as practical as any other.
I would like to introduce you to an special piece of history, the Wheeler Wilson #3 sewing machine. Now those that know me understand I do have an affection for old things of all kinds but the sewing machine hold a special place of honor to me as it is the main tool of my trade. This one deserves a page of it's own.
The maker is the Wheeler Wilson out of Bridgeport Connecticut. More on the people who started it and what they did is here : Wheeler and Wilson Company Info. The company was founded in 1854 and this sewing machine was made in 1859, making it one of the earlier models. What makes it even more unusual is I have been told that it appears to be an industrial make, for use in a shop. The difference between the home model and the shop one is the large hand wheel and the pattern of the irons.
Wheeler Wilson #3 Irons
It was quite rusted when I got it and was frozen stiff. After a lot of oil, cleaning and de-rusting it does turn. I can't explain to you the feeling I had when I first saw the operate. It was as if history was revealed to me. What incredible ingenuity from long ago.
Some things about it were strangely familiar. Every person who uses a sewing machine today knows about a "feed dog" mechanism. Here is it's first application in a machine. It was the Wheeler Wilson that had it first. So simple yet so effective. I've removed the cloth plate to show how it works.
It has a four part action. With this machine, there is a problem with that. It seems to be missing something to hold it down so it works best when I have my hand on it lightly. When the cloth plate is on it makes a lot of noise because of this. I have used another model that is similar and it was not like this one so I will have to improvise a fix. Somehow I know the local sewing machine repair guy is not going to help me. For those who enjoy using older machines, you know this already: the modern machines we use today are not that different from those made a hundred years ago in some ways. Here is a great example. Another is the round bobbin.
It sews from side to side using the feed mechanism as show above and a long curved needle. The needle arm is a separate arm to the presser foot. The needle itself is long and has a slight curve. When inserting the needle, the operator is to determine where the needle is to be set, rather than like today where you place the needle up as and it fits in place. It takes a careful eye to figure this out and some knowledge as to how a lock stitch machine works to do this correctly. I am still learning. One major drawback to using a sewing machine of this type is the needles are extremely scarce. I have two. I wish there was someone who makes these but alas, that is not the case.
Note the curve and channel in the needle.
Very Early Rotary Hook. This is the correct placement for the needle.
The bobbins are scarce as well. I have only one. They are not unlike our bobbins of today, just shaped differently. The round bobbin was another Wheeler Wilson patent. The bobbin fits under the machine and it held in place by a holder that is screwed into place.
Bobbin for Wheeler Wilson #1-4. Mine is so particular it will only work with the bobbin placed the same - the same side out. I can tell from the rust that this it to be "outside". If you have trouble, maybe yours is also finicky.
Bobbin Holder in place. To set, push in the holder and tighten the screw. I then release it slightly to allow the bobbin to turn and tighten again.
Winding the Bobbin
The fabric moves from side to side, left to right. Of all the things that make this a cool machine it has to be this. It is so different, yet I have already wished I could use it more. I was fixing a life vest that needed new buckles on the webbing at the sides. To make a long story short, if I could have sewn sideways, I would have been able to fix it in about one minute. Sometimes getting the fabric under the harp of a sewing machine can limit what you can do.
Here is the machine in action. Note the direction of the work.
Now about the cosmetics. This was very rusted. There was so much greasy dirt on it I could see almost no decal on it. With a little cleaning, here is what I found.
Painted Floral design, like a Fuchsia Blossom.
The presser bar arm and needle arm both appear to have been plated as there is a remnant of a shiny silver coating in some places. All of the cleaning was done slowly and carefully. Rust was removed by using "Evapo Rust". Anything that was rusted was then coated with sewing machine oil. The painted areas were lightly coated with carnauba wax. Not much there as it is not in great shape. This entire machine was well used, for sure. All moving parts are lubricated before use.
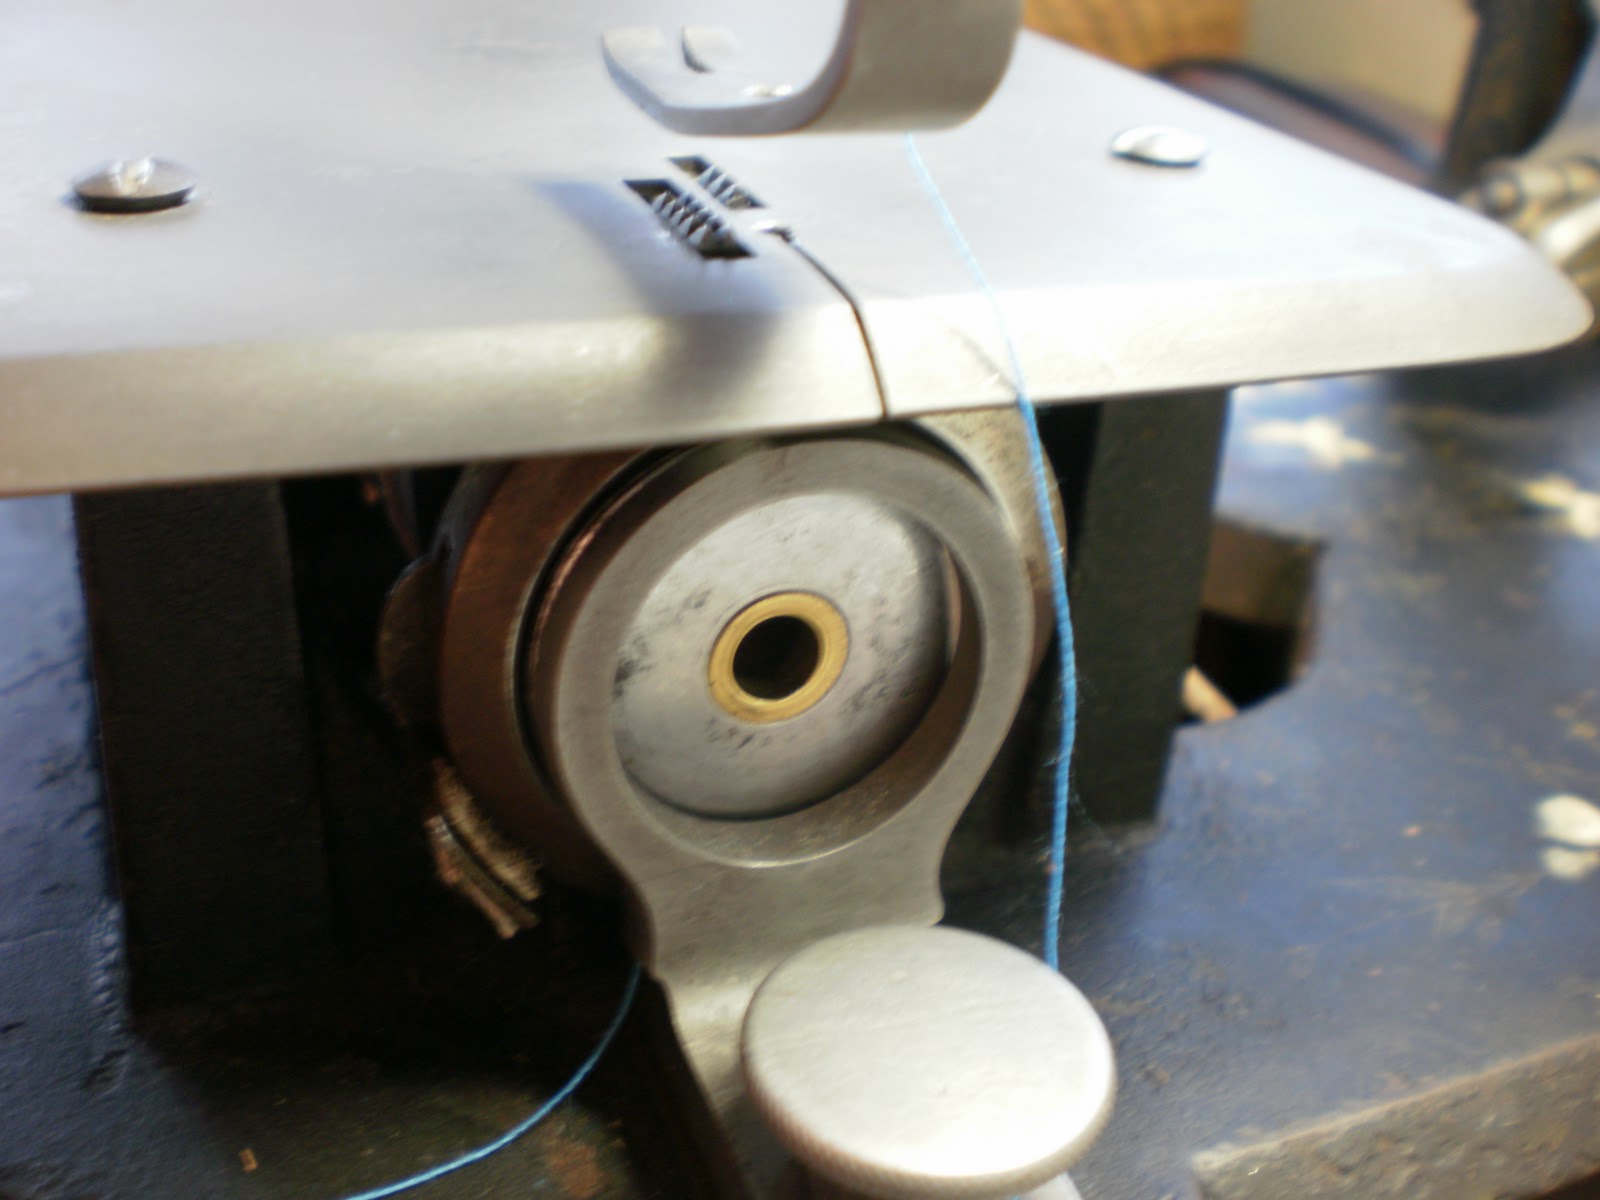
There is an unusual feature that I was sure was not original but have since found out that it indeed was. The tension for the machine is regulated by a round hard wood spool and a clip. This allows for a large amount of thread or a heavy thread to be used. Here is the tension mechanism in place with blue thread. Surprising to me, this works pretty well.
Tension Mechanism and Thread Spool. It can be adjusted by tightening or loosening the knob.
A new treadle belt was cut for me at Tandy Leather and sewn in place. Different Wheeler and Wilson models have different widths. Inexpensive and looks great. It's a bit loose right now.
Lacing for treadle belt. This arrangement allows for adjustment on either end.
In conclusion, I have been tinkering with this machine for a long time. It is not the easiest machine to use. The needles are so rare that I am very careful with how I use the machine for fear of breaking one.
The parts are so simple yet all has to be perfectly in place for it to work. Yet for all the frustration, when it does work it is a joy to behold. After over 150 years, just being here is enough.
This is completely off topic, unless using a vintage kitchen tool counts. The tool in question is a Dandy Jar Churn. It was a special gift that makes me feel good every time I use it for the "I did it myself" quality. Have you ever wanted to make your own butter with a jar churn? If you have one (or know someone who does) here's how.
You will need:
*Jar Churn
*1/2 gallon whipping cream (1.89L)
*1/2 to 3/4 Tsp salt if desired.
*Flat wooden spoon
*Large bowl
*container to hold butter when done
"Dandy" Jar Churn
Notes: I get the cream at Costco. The wooden spoon is the type used for rice. Some people use a masher to clear the milk from the butter.
Making the Butter
Bring cream to room temperature, not cold. Approx. 50 dregree F. (Thanks to Dora for this help - cold cream takes longer). Fill jar churn half way. Do not fill it more, as the cream with expand during the process. Turn the handle fairly quickly. This will take about about 15 minutes to be done. Several stages happen with the cream during this time. The first is the cream gets frothy and expands.
First stage of churning.
The cream next becomes very stiff, like whipped cream. It's hard to keep turning but don't give up now!
Next it will become a little more milky and then suddenly you can see the butter. It looks like grain or granules of butter. You can stop now.
You can stop when it looks like this. The buttermilk has separated from the butter.
Next, clear the buttermilk from the butter. It is important to do this thoroughly as any milk left behind will become rancid and spoil. I do this by draining buttermilk into a jar ( about 2 1/2 cups) and the butter granules into a large bowl.
Rinsing the butter.
Add cold water and swish it around to release the excess milk. Pour out water and fill bowl again. Continue by using the wooden spoon to press down butter and press out excess water. Repeat this until the water runs clear.
Remove all small amounts of excess water out by pressing with the spoon and tapping the butter with a paper towel.
Add salt to taste, if desired. Mix with spoon completely. Start with 1/4 tsp and add more in small amounts from there. (I usually go a little over 1/2 tsp.)
Scoop into your mold.
I used muffin tins this time but many things can work. A glass covered casserole or Tupperware for example. The finished amount is about 25 oz. This try was not so easy. I had to use a small knife to remove them, argh. I does give a nice shape and size though at 2.5 oz each and 1/3 cup in measure. I still search for the perfect mold. Perhaps a rubber one. Place any molded butter into a refrigerator to harden before removing.
Good idea, but did not work so well.
Wrapped in wax paper and stored in refrigerator.
So creamy and yummy. It comes out a lovely color and flavor.
It is hard to imagine the age of some sewing machines and the clothing styles they made when new. This is especially true of the very old ones. Now they are still commonly found. Seen in thrift shops and antique stores. They inhabit hallways, garages and spare bedrooms. They had their days of glory, their time.
For those who like to make things, whatever it is, there is a good feeling that comes from finding and using a new tool. For those that make things like clothing, the possibilities are near endless for tools to improve the process. Here is a good one. The Singer Gauge Presser Foot. I got one for myself as a business need mainly but it has turned out to be generally helpful too. They are not common or cheap, but in my opinion, they are very useful for low shank strait stitch machines.
Gauge presser foot, unlocked.
The gauge foot comes with metal measures. I have three parts but this is an incomplete set. What does it do? It does several things but one thing really well. It can make a perfect channeled seam and edge stitch. When using a zig zag machine that has a movable needle position, a normal edge stitching foot can work. For edges, a edge stitch guide can work. When edge stitching on the top of a garment, it gets tricky. I do this a lot when making corsets as the has to be a channeled seam for the boning to fit inside. Here is an example of how a seam for a corset looks when made without a gauge.
Free hand top stitched seam
Here is a seam made with a presser foot gauge:
Top stitched with gauge presser foot
It is much more strait and so looks much better and will wear evenly with time.
The measures can be used for left or right, another handy feature. Measuring a seam from the bed is easy with tape or seam guide but not so for the other side. Here is a photo of it in use:
Left measurement alignment
The lack of adjustable needle position was one thing that kept me from using the old Singer 201 and Pfaff 131 for this type of project. Despite this one thing, the machines are better as they can handle the heavy fabrics with ease. Now I can have the best of both worlds. Yeah!
I just had to have this fabric. There are a few babies soon to be entering the family circle so I actually have a reason, unlike the usual scenario for impulse fabric buying. The problem is I am not a great quilter. I have made a couple of projects but they involve squares only. Big ones and little ones. The problem now is I have the fabric but not pattern or directions telling me what to do. Fun fabric, an idea and penciled equations are all that's needed right? Here is my story.
OK, cutest fabric set ever. Pokey Little Puppy fabric sold in panels, just like the book from way back when. It can be made into a soft book (but with no words) or it be used as I did, in a quilt. I cut out the "pages" and thought it would work as an Irish Chain style, as that pattern requires a big square in the center. Good so far, then it became obvious that this square was not an easy 8 or 6 inch, it was 7.5. Math! When making up the squares problem two came up, the puppy squares were not square - but more off grain. Some trimming was in order but it was minimal. From there things progressed with the usual goofy mistakes. Has anyone done this before?
The border and back went together as planned, amazingly. The machines worked well and were great to use. The one I used for piecing was a Necchi Mira. The quilting was done with a Pfaff 131, with the exception of the little bit of free motion work on the borders done with my Bernina 730. It seems each machine has something it does better than the rest.
The backing was off and did not fit perfect, I poked myself with a needle when hand sewing the binding and ran out of thread while quilting the borders. Then........
It came out just fine.
I can't wait to make another one! The directions need some serious revamping, and so they can not be posted for your own protection and sanity.
One of my favorite sewing machines is also an unusual one. It is operated by turning a handle. They were many made by manufacturers in many countries with a lot of variety. The hand crank sewing machine was more popular in Europe but there were many in North America and the world as well. Many can still be found today. My particular model is a Singer 66 from 1909 and decorated with a lotus floral pattern, part of a very popular Egyptian art style of that time. I take this one out from time to time to use and to demonstrate how sewing machines work in slow motion. It is not just show, however, and I'd like to point out that this type of machine can do more.
I feel that hand crank sewing machines do two things exceptionally well: Purse making and doll clothes making. It's all about control. The handcrank sewing machine is best when you need close control of stitching for best results. This is handy when closing the edges of purses around handles. The large harp area of the Singer 66 also helps. The photo above shows rick rack that was inserted quite easily.
Projects that require precision, such as doll clothes shown here, are perfect for the handcrank sewing machine. The small size of doll clothes make them a bit finicky but a great way to learn to sew. This is especially true when combined with the slow speed of this machine. So many great seamstresses started this way, as the clothes are made much like the real thing. You can see that here, with the bodice of a Barbie dress.
Barbie dress bodice with turn under facings and darts.
Beginning a seam
What's Different? There are some things about using a hancrank that take some getting used to. One of those things is that the beginning a seam, for me, is handled differently. Because you have one hand to control fabric and there is no reverse motion your normal routine will change slightly with a handcrank. Keeping the thread from tangling at the beginning is one problem. I prevent this by holding the thread with my index finger, I also pin up close at first then remove it after a few stitches. To keep the first stitches from unraveling, lock the stitch it is done by re-stitching the first two stitches This is just what is done with treadle machines or those with no reverse. To re-stitch, I simply give the fabric a slight tug while beginning the seam so the first stitches get stitched over.
As an aside, I use this little tool a lot: the Clover Mini iron. It can be used right next to the machine.
Connecting the bodice to skirt. Just like a real dress.
All done!
How does it work?
One question I hear often is how can I turn the handle and sew at the same time? It does take some practice but can be done with great success. Turn the handle but don't look at it. Keep your eye on the presser foot. Keep your other hand on the fabric. An advantage to this process is you can really look at what you are doing and slow or pick up speed accordingly automatically. That is not as easy with electrics or treadles.
Feeding fabric through strait is the goal. The machine should pull it fairly evenly. If does not, the main issue is usually the tension with mine. If your machine thread tension too tight, it will want to distort and pull the fabric off center. With correct tension, proper needle, and slow speed you can lightly guide fabric right on through. Presser foot pressure is also sometimes a problem. Check to make sure you do not have it too tight. This is adjusted by a top screw above the faceplate. If you are not sure about this subject, check your manual. It's good to know how it all works.
If you have not seen a handcrank sewing machine in action, here's a quick view.
Can I Make My Own Handcrank?
Sometimes older machines are converted to hand crank. There are inexpensive modern kits to do this. The machine needs to have a place to mount the handle. Good candidates are the Singer 27, 28, 127, 128, 66, 99 and the Singer Spartan. I have heard good things about the Necchi BU machines as well. There are many reasons for wanting to convert. I have done it for a Singer 128 that was in a broken treadle cabinet. Finding another 3/4 sized cabinet for that model would have been tough due to rarity. Not all machines can be changed but some can.
All in all, these are a great addition to anyone's home. They are portable, beautiful, can be used by children and most important...they take up little space!