
I would like to introduce you to an special piece of history, the Wheeler Wilson #3 sewing machine. Now those that know me understand I do have an affection for old things of all kinds but the sewing machine hold a special place of honor to me as it is the main tool of my trade. This one deserves a page of it's own.
The maker is the Wheeler Wilson out of Bridgeport Connecticut. More on the people who started it and what they did is here : Wheeler and Wilson Company Info. The company was founded in 1854 and this sewing machine was made in 1859, making it one of the earlier models. What makes it even more unusual is I have been told that it appears to be an industrial make, for use in a shop. The difference between the home model and the shop one is the large hand wheel and the pattern of the irons.
 |
| Wheeler Wilson #3 Irons |
Some things about it were strangely familiar. Every person who uses a sewing machine today knows about a "feed dog" mechanism. Here is it's first application in a machine. It was the Wheeler Wilson that had it first. So simple yet so effective. I've removed the cloth plate to show how it works.
It has a four part action. With this machine, there is a problem with that. It seems to be missing something to hold it down so it works best when I have my hand on it lightly. When the cloth plate is on it makes a lot of noise because of this. I have used another model that is similar and it was not like this one so I will have to improvise a fix. Somehow I know the local sewing machine repair guy is not going to help me. For those who enjoy using older machines, you know this already: the modern machines we use today are not that different from those made a hundred years ago in some ways. Here is a great example. Another is the round bobbin.
It sews from side to side using the feed mechanism as show above and a long curved needle. The needle arm is a separate arm to the presser foot. The needle itself is long and has a slight curve. When inserting the needle, the operator is to determine where the needle is to be set, rather than like today where you place the needle up as and it fits in place. It takes a careful eye to figure this out and some knowledge as to how a lock stitch machine works to do this correctly. I am still learning. One major drawback to using a sewing machine of this type is the needles are extremely scarce. I have two. I wish there was someone who makes these but alas, that is not the case.
 |
| Note the curve and channel in the needle. |
 |
| Very Early Rotary Hook. This is the correct placement for the needle. |
The bobbins are scarce as well. I have only one. They are not unlike our bobbins of today, just shaped differently. The round bobbin was another Wheeler Wilson patent. The bobbin fits under the machine and it held in place by a holder that is screwed into place.
 | |||||||||||||||||
| Bobbin for Wheeler Wilson #1-4. Mine is so particular it will only work with the bobbin placed the same - the same side out. I can tell from the rust that this it to be "outside". If you have trouble, maybe yours is also finicky. |
 |
| Bobbin Holder in place. To set, push in the holder and tighten the screw. I then release it slightly to allow the bobbin to turn and tighten again. |
 |
| Winding the Bobbin |
The fabric moves from side to side, left to right. Of all the things that make this a cool machine it has to be this. It is so different, yet I have already wished I could use it more. I was fixing a life vest that needed new buckles on the webbing at the sides. To make a long story short, if I could have sewn sideways, I would have been able to fix it in about one minute. Sometimes getting the fabric under the harp of a sewing machine can limit what you can do.
Here is the machine in action. Note the direction of the work.
Now about the cosmetics. This was very rusted. There was so much greasy dirt on it I could see almost no decal on it. With a little cleaning, here is what I found.
 |
| Painted Floral design, like a Fuchsia Blossom. |
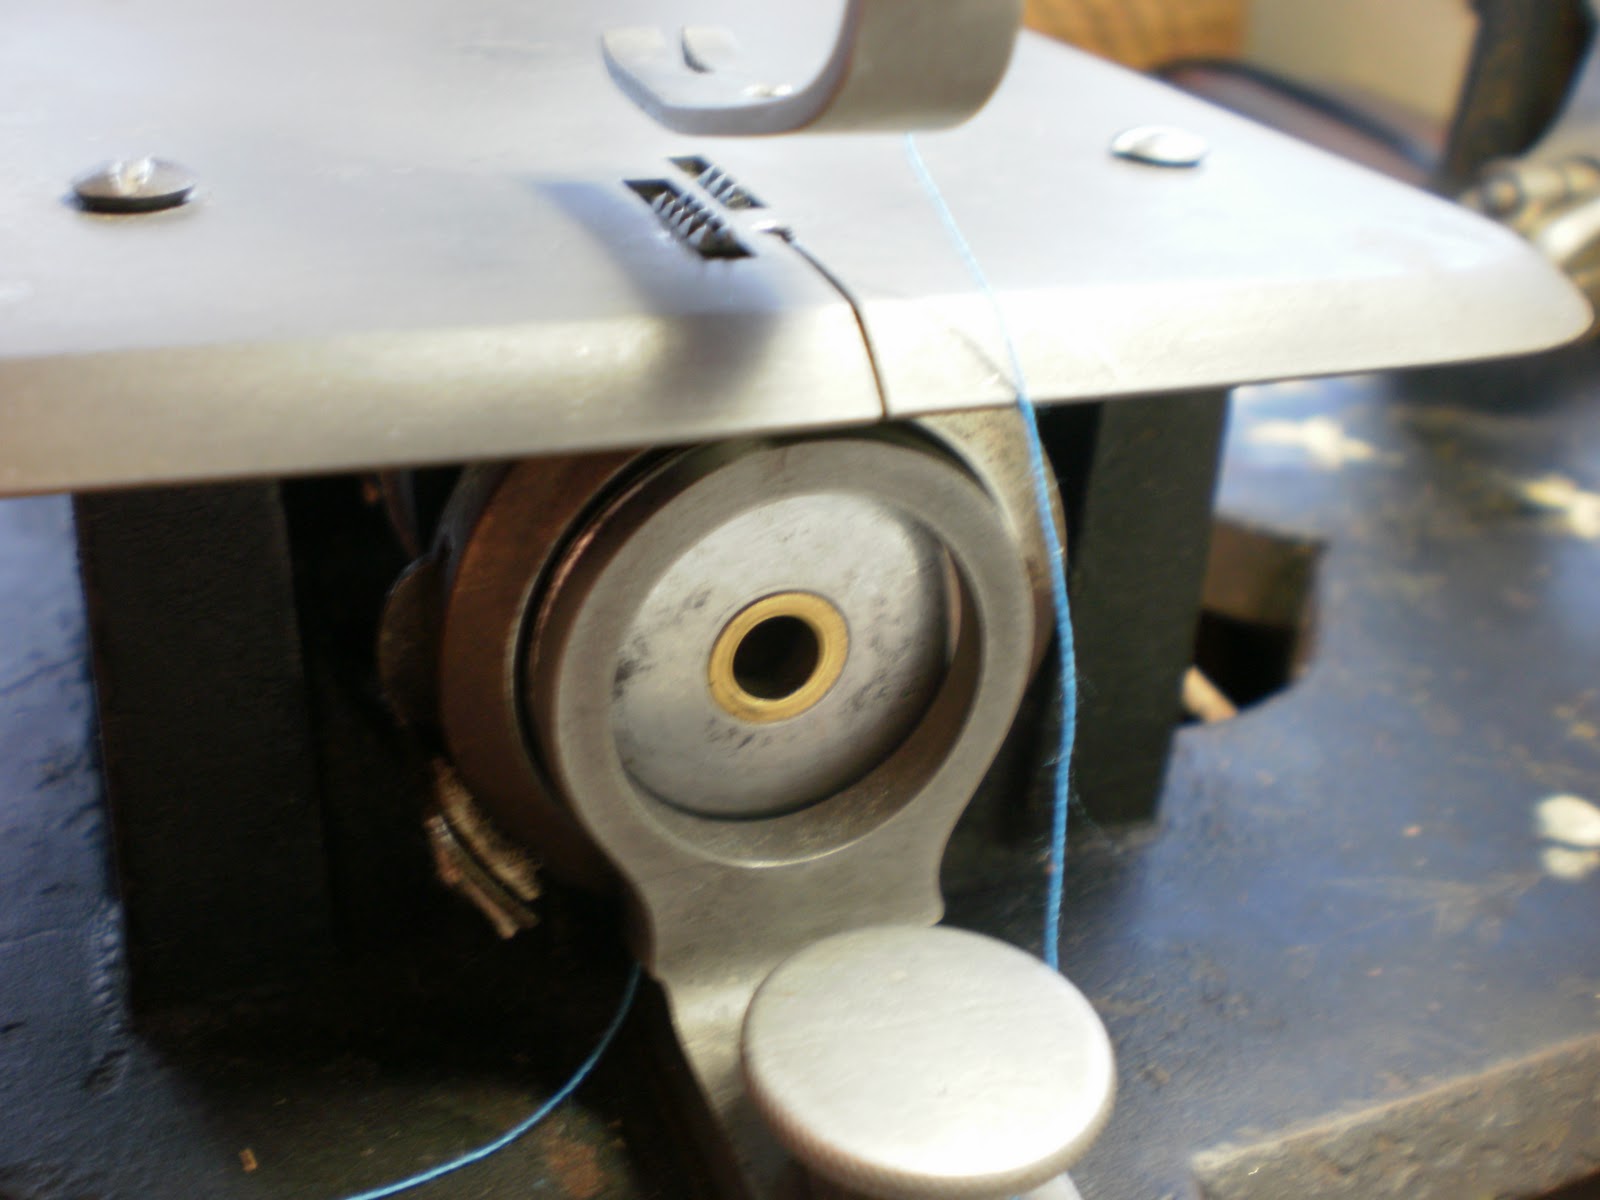
There is an unusual feature that I was sure was not original but have since found out that it indeed was. The tension for the machine is regulated by a round hard wood spool and a clip. This allows for a large amount of thread or a heavy thread to be used. Here is the tension mechanism in place with blue thread. Surprising to me, this works pretty well.
 | ||
| Tension Mechanism and Thread Spool. It can be adjusted by tightening or loosening the knob. |
A new treadle belt was cut for me at Tandy Leather and sewn in place. Different Wheeler and Wilson models have different widths. Inexpensive and looks great. It's a bit loose right now.
 |
| Lacing for treadle belt. This arrangement allows for adjustment on either end. |
The parts are so simple yet all has to be perfectly in place for it to work. Yet for all the frustration, when it does work it is a joy to behold. After over 150 years, just being here is enough.
 |
| 1859 Visiting Dress. |


