Showing posts with label Vintage Sewing Accessories. Show all posts

Friday, December 30, 2011

The Thor Gladiron Mangle


Oh, boy I got a little crazy this time.  I was shopping my local favorite thrift shop and low and behold this beauty was sitting in the corner.  It was an item I have long been curious about, an iron mangle.
The Mighty Ironrite
 Many times I have seen lovely ones like this Ironrite but space has always been a problem.  Now here was a little one that I could actually fit in my sewing space!  It came home right away.
She's So Cute! 
The Thor Gladiron is a bit less common and sophisticated than the bigger and more deluxe Ironrite but it does have it's charms.  The idea of using a roller iron is not gone, there are still mangles made today.  The Miele company has a nice one as seen Here. There is less demand of course as we just don't do so much household ironing.  Who irons bedsheets and tea towels?
Fabric on the Roller

Using this item has taken some practice.  Now, I am a dinosaur that actually does iron clothes and with sewing there is always a need for an iron.  Operating a Gladiron is almost completely different than what I am used to.  Thankfully, there is an instruction manual that shows how to iron every thing from dish cloths, shirts, bras and even underwear.  The main selling point is that you can iron a shirt in 4 minutes - but I have not been able to do it nearly so fast.....yet.  I am still trying to get used to using a spray bottle and two hands for handling the fabric without it pulling all crazy through the roller.  Practice practice practice. 

How it works: It works by just placing the fabric on the arm, plug it in and then the fabric feeds through.  Keep hands away from lava hot metal iron. 

Gladiron Temperature Gauge

It is a simple machine really.  There is a temperature control dial that can be adjusted with great sensitivity - moderate to very very hot.  Much variable heat than a typical iron.  Once it is plugged in the roller turns.  There is no on/off switch.  All controls are with a knee lever that has 3 positions.  It is a combination of those three position that make it stop, open or move again.
Three Position Knee Control
 Once you get a feel for it it's really easy.  There are side extensions to add to the work space but I have no room now - even for a picture, sorry.  They are stored underneath for the time being.
Gladiron Table Extensions
  The nice thing about this, other than it's utter coolness, is that is takes up as much space as a nightstand.  If you need to store it, the entire top can be folded downwards to fit inside frame sideways.  I broke the screw that holds it in place in transit, so no folding for the time being.
Now, it won't replace a regular iron and board but it does have some use.  I pre-wash a lot of  fabric and getting it pressed for cutting is a pain, particularly if there is 2 or more yards.  This baby makes short work of that job, and does well at high and low temperatures.  It's kind of fun to use too.
Here's a quick view if it in action. 

Sunday, June 12, 2011

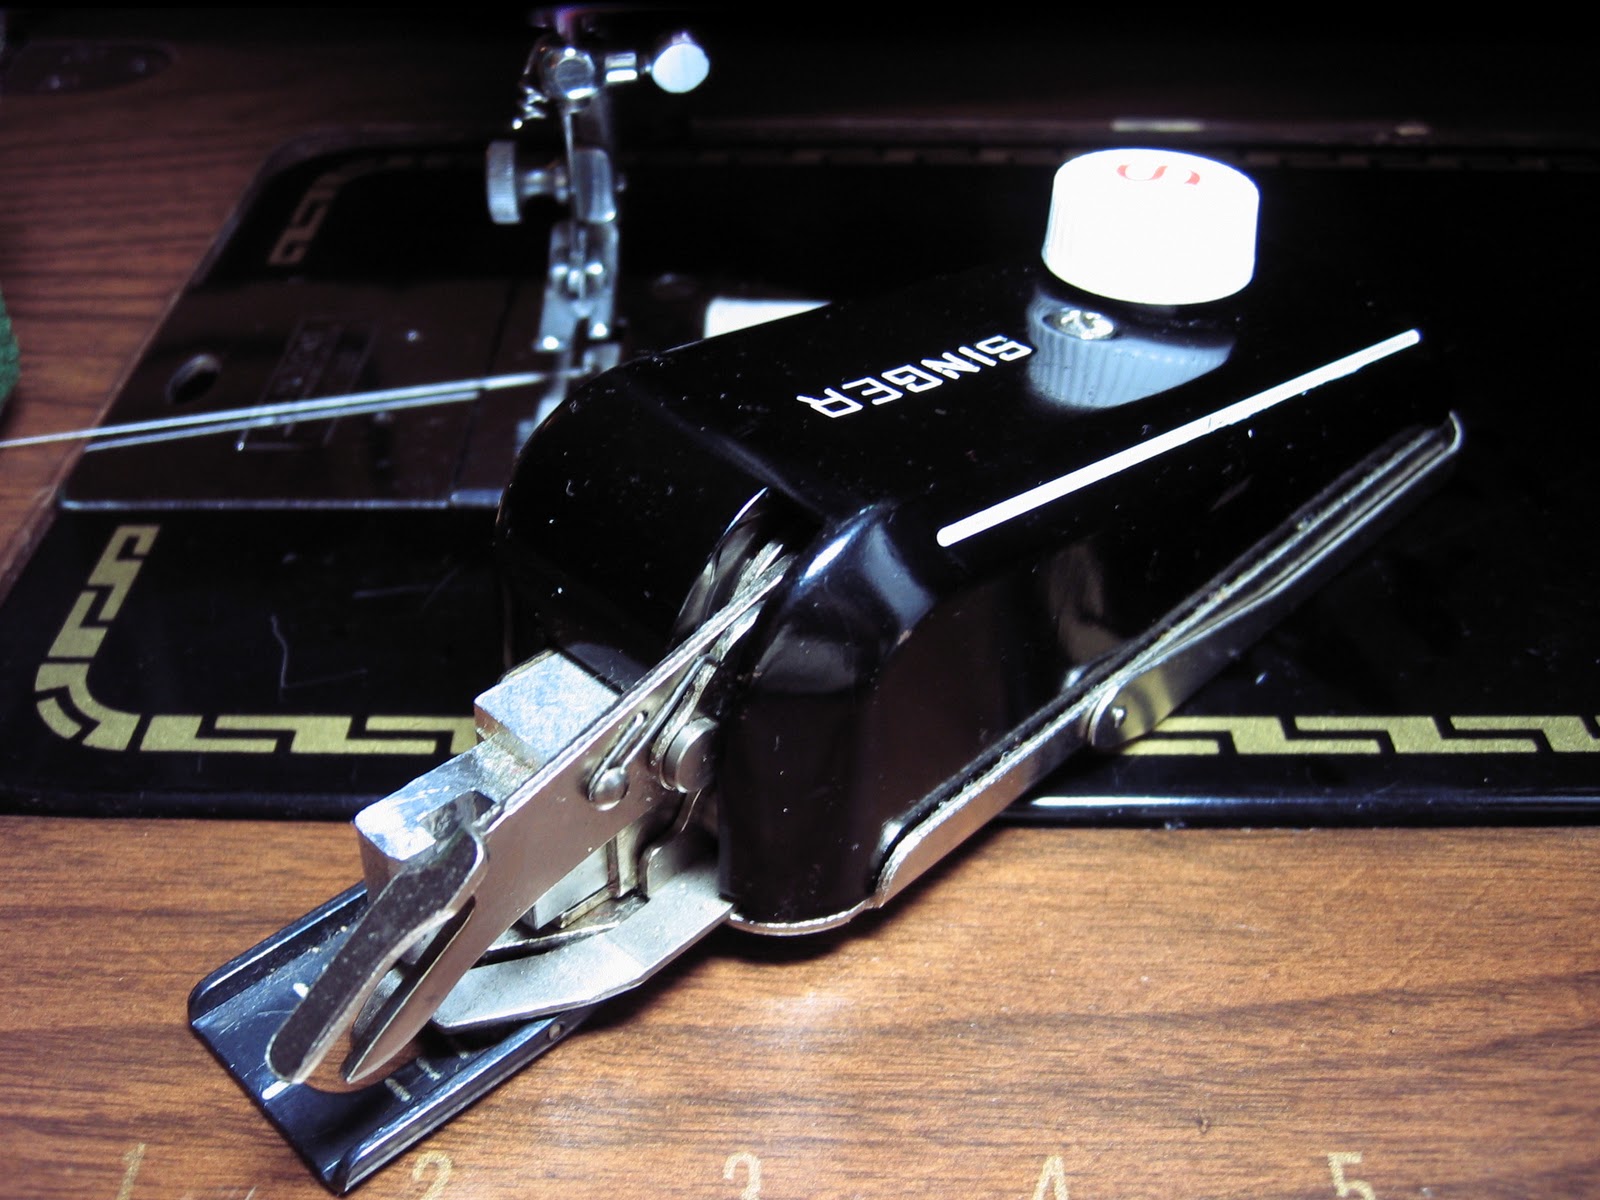
The Singer Blind Stitch Attachment


This little thing has been an attachment I have avoided using for a long time.  It came in a case with a sewing machine so it was a stow away.  I'll be honest,  I simply do not like to hem at all...anything.  Being a "petite", hemming has been the bane of my fashion existence.  Nearly every garment I have bought or made needs a hem adjustment.  Ugh.  Anyhoo........maybe this can make it easier?  I'll discuss that and how to use it here.

Background Information:
This is a low shank attachment.  I am showing this on a Singer 221 (Featherweight).  It should work the same on any strait stitch low shank such as the Singer 201, 15-91, 27,28, 127, 128 or 66 (except the back clampers). 

You will find it easier to use if you have a manual.  You can find one here:
Singer Blind Stitch Attachment Manual

Attaching the Blind Hemmer
 *raise the presser bar.  Attach the blind hemmer by setting it on the presser bar at the same time hooking the fork through the needle clamp.  Screw in place.

Helpful Hint:
It is a very good idea to test this out before you sew on your garment.  There may be an adjustment needed to the width of the "bite" of the stitch.  That is made by moving the black metal part on the top of the presser foot of the hemmer.  For lighter fabrics (smaller stitch) it goes left, for bigger (heavier fabrics) it goes right.  I keep it in the middle for cottons, to the right for denim.

Preparing the Hem:
Turn Up Top Hem Allowance (apprx 3/8")
Fold Again in Place.

* Turn up the hem to where you want it and press in place.  If it is a difficult to handle material, baste in place.
Turn to Underside
 *Turn the hem to the underside - wrong side up.  There should be a 1/4" extension for sewing on face up.

Fabric Placement for Hemming
* Place the fabric just like this under the blind hemmer.  Be sure to pay attention to where the little metal guide thumb is.  Your top fold should be next to this.
*Start sewing slowly.  You'll notice the line of strait stitching and then the hemmer will jump over.  That's why I recommend you take it easy - to keep it lined up.  If you are not careful, you'll be doing this....
Bad Blind Hemming
It is very easy to sew over the fold. 

Good Blind Hemming
It should look like the photo above.  Note how close the stitches are to the fold but are not on it.
*Sew entire hem in place.
Opened Hem
 *Open out hem.  This is what the hem looks like from the inside of the garment.  Note the basting line of stitching and the blind hem line of stitching.
Finished Hem
*Turn garment to the right side out and press it smooth.

Final Opinion:
It looks almost invisible, even with problem areas.   That part is good , but this can be frustrating to use at first.  I put it away several times on different projects in disgust.  Possibly there is a learning curve with this attachment.  It will be used more now as I have gotten a little more practice.  The results are great.  This can be a real time saver for projects like full skirted dresses and curtains.
If I had to choose, I'd use a zig zag machine with a built in blind hem for most projects.  It is easier to be accurate.   There are those times that a small and light machine is what I travel with and most of those times that means an Elna Grasshopper or the Singer 221.  Once in a while even a non electric is needed (long story) and so a hand crank 28 comes out with me.   That is when I'd use this and so it's worth keeping in a well stocked sewing tool kit.
This do-hickey is recommended.

The Greist Decorative Zigzagger

Greist Zigzagger

Here I go with yet another zigzagger attachment.  This one goes up against my little Chadwicke's that I reviewed earlier.  I found this one and thought it deserved a bit of a test as they are fairly common and Greist makes very good accessories for many models of machines.  The one drawback to older strait stitch only machines is, well, they are strait stitch only.  There are times a zig zag stitch is handy to have such as with edge finishes on exposed inner seams.  Because of this I like to have a zig zag attachmentclose at hand even for this limited use.  Here's another one I've found. How does it work?  Does it work?
Background Information
These are made for strait stitch machines, I used a low shank Singer 221 (Featherweight) but this would be good for any low shank strait stitcher.  Some examples would be the Singer models 201, 15-91, 27, 28,127, 128, 66 (not the back clampers), Pfaff 131.
Greist Zigzagger with Templates

The Zigzagger comes with a permanent template for making a basic zig zag stitch and has some additional ones for embroidery type designs to add if you want to change the look.  There is a thumb screw for hooking it up to your machine.   The red colored part is a removable snap to hold the extra templates in place.

Attaching the Zigzagger

How to Use:
*Remove presser foot, keep presser bar up.
*Hook the Zig Zagger to the presser bar and at the same time make sure the "arm" hook is on the needle scew.  This is just like a buttonholer.

Note: I was having some trouble with adjustments on this at first, only to find my machine's thread cutter was in the way of the zigzagger's movement.  You can simply turn the needle threader to the back by pushing it .


Adjust Width of Zigzag with This
* Adjust the width of the Zig Zag stitch by making loosening the screw then moving the metal bar.  The #1 is the most narrow zig zag stitch.  Adjustment of the spacing of the zig zag stitch is done by your machine's stitch length lever.

Template Snap

 If you want to change a template, remove this snap.
It comes off just like this....
Adding the little template.
Changing the template is easy, I do it right on the machine.  The snap is just like a clothing snap, works great for this.  The template goes on right over the permanent one.

*When ready, lower presser bar and start slowly with stitches.  That's all!  It moves all over, don't worry.

Here is what the zig zag looks like on fabric:
Zigzagger Samples
 Does it work?  Yes, but the quality is not that great with the simple zig zag but it is OK.  The patterned decorative stitches are better.  I find it difficult to get a significant change in the width of the stitch in the simple zigzag setting.  Strangely, I have the same problem with my other one, the Chadwicks Zizagger.  The extra templates make some good stitches like the ones shown above.  They might be handy if using knits or you want to hem with a simple blind stitch.  Because it can do both, it might be  a nice addition to a traveling sewing tool kit.
As a final note, I suggest making up a sample with the number of the template written in ink for each setting.  They all look alike and this will save you a lot of testing later.  Do the same for the zig zag  and it's settings. 

Thursday, January 20, 2011

Singer Gauge Presser Foot

Gauge Presser Foot making a felled seam.
For those who like to make things, whatever it is, there is a good feeling that comes from finding and using a new tool.  For those that make things like clothing, the possibilities are near endless for tools to improve the process.  Here is a good one.  The Singer Gauge Presser Foot.  I got one for myself as a business need mainly but it has turned out to be generally helpful too.  They are not common or cheap, but in my opinion, they are very useful for low shank strait stitch machines.
Gauge presser foot, unlocked.
The gauge foot comes with metal measures.  I have three parts but this is an incomplete set.  What does it do?  It does several things but one thing really well.  It can make a perfect channeled seam and edge stitch.  When using a zig zag machine that has a movable needle position, a normal edge stitching foot can work.  For edges, a edge stitch guide can work.  When edge stitching on the top of a garment, it gets tricky.  I do this a lot when making corsets as the has to be a channeled seam for the boning to fit inside.  Here is an example of how a seam for a corset looks when made without a  gauge.
Free hand top stitched seam
Here is a seam made with a presser foot gauge:
Top stitched with gauge presser foot
It is much more strait and so looks much better and will wear evenly with time. 
The measures can be used for left or right, another handy feature.  Measuring a seam from the bed is easy with tape or seam guide but not so for the other side.  Here is a photo of it in use:
Left measurement alignment

The lack of adjustable needle position was one thing that kept me from using the old Singer 201 and Pfaff 131 for this type of project.  Despite this one thing, the machines are better as they can handle the heavy fabrics with ease.  Now I can have the best of both worlds.  Yeah!

Monday, November 8, 2010

An Old Fashioned Good Idea, The Buttonholer


I see them all the time in my thrift shop adventures.  Odd looking contraptions used to make buttonholes on your home creations.  I gathered a few and never used them until maybe a year ago.  How foolish.  These things are fun, and do an amazingly nice job.  Be warned, they are crazy to watch and they make a lot of noise.   An "entertains kids and pets" kind of thing.  For those interested in learning to sew, here's a good example of economy.  Save yourself some money and get a good older machine then add some fun stuff to make it more useful, like a buttonholer.  You won't have a one step computerized buttonhole, but this is pretty good and costs a lot less.


Usually the buttonholer box has a small manual in it.  To help make it easier to understand and a bit less scary, here are some visuals on set up and use.  The manual will tell you about changing the settings, making samples and where to start on the garment.  Enjoy!
Low Shank. Not all will fit all machines. Check This before you buy one.  This is shown on a Singer 15-91.

Fit hook over needle screw as you put it on.

Set template in, moving the plate if necessary

Screw cloth plate onto bed. This can be hard to do.

I use tape to secure the front.


Now, here is a buttonholer in action....